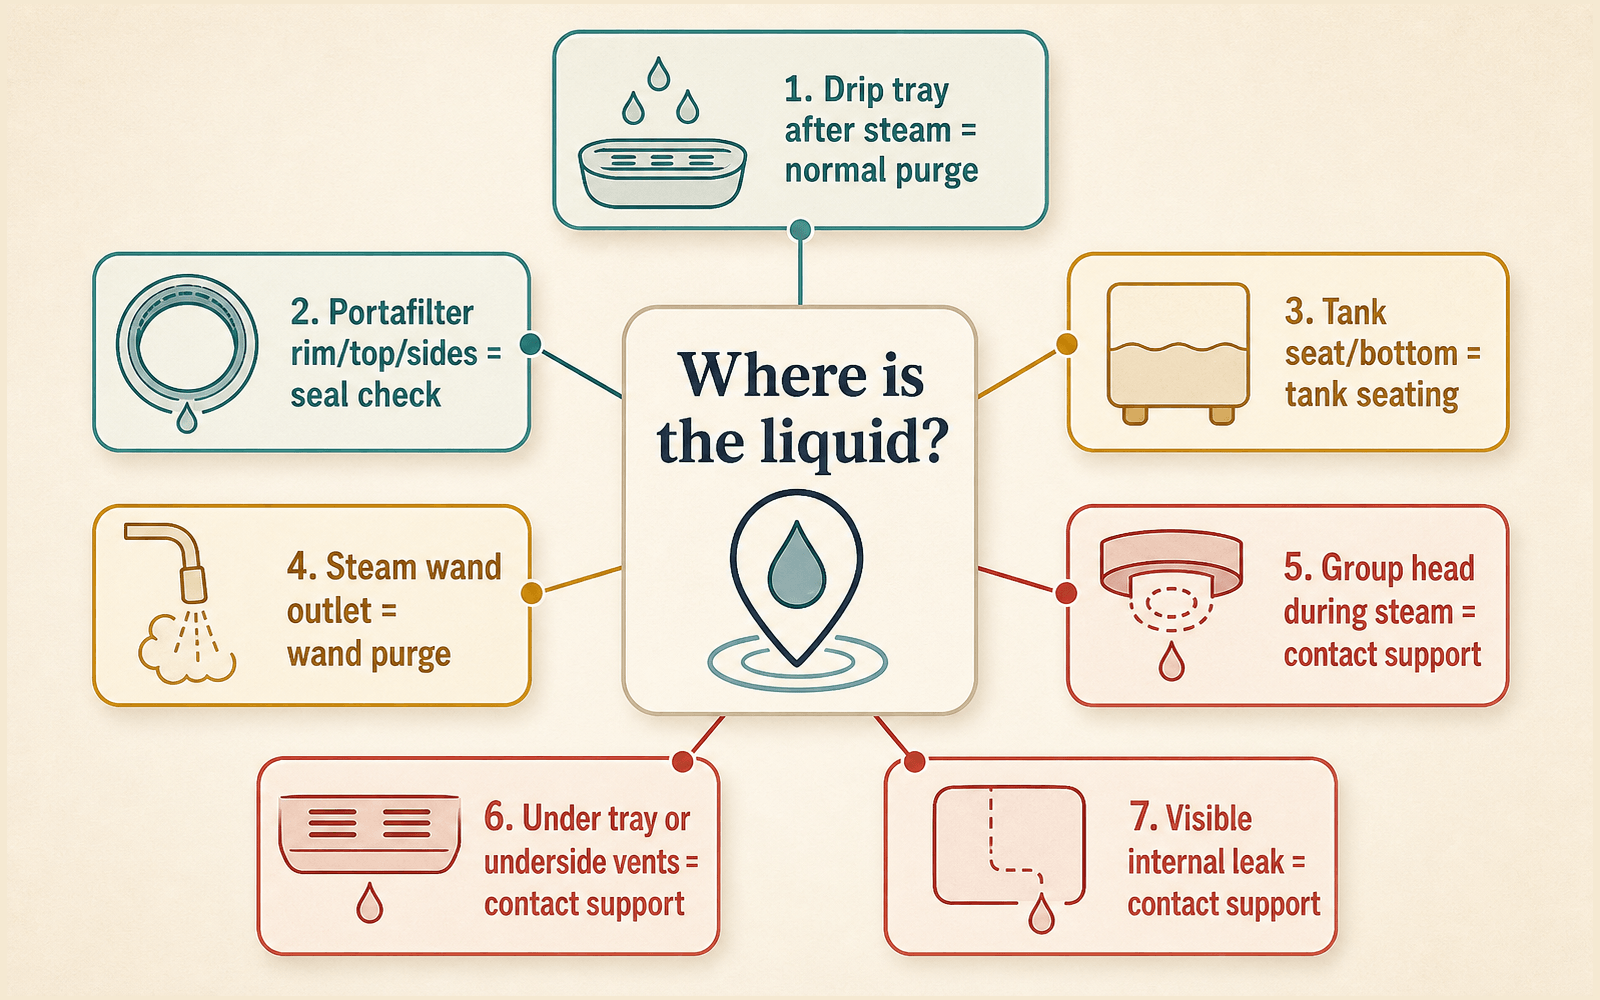
Start with the first wet spot
Guessing at a Bambino Plus leak can waste coffee, cleaning tablets, and patience. A portafilter rim leak is not solved the same way as normal purge water in the drip tray, and water from the group head during frothing is not the same as steam-wand purge. First identify the first wet location, then match it to the timing.
Watch one shot or frothing cycle with the tray seated and emptied. Do not start by changing grind, descaling again, or ordering a gasket. Start by locating the first place liquid exits.
| What you see first | When it happens | Most useful first check | Stop using these checks when |
|---|---|---|---|
| Water inside the drip tray | Immediately after steam | Seat and empty the tray; this can be auto purge | Water is under the tray, the tray overflows, or shot output is poor |
| Espresso around the portafilter rim, top, sides, or handle | During extraction | Relock, clean the basket rim, reduce/trim dose, and check accessory clearance | Liquid still escapes around the rim after the portafilter seats fully |
| Thin streams or spray from a bottomless basket outlet | During extraction | Treat it as puck prep: grind, distribution, and tamp | Liquid also escapes above the rim or down the handle |
| Little or no espresso, with water going to the tray | During brew or after cleaning | Check tank, descale need, grind, dose, tamp, and basket holes once | Most brew water still dumps into the tray |
| Water, steam, or milk from the group head | During or after frothing | Confirm the wand was lowered before milk texturing starts | It repeats, especially if milk appears at the group head |
| Water under the machine, near the tank seat, or from underside vents | First use, idle, or after brewing | Reseat the tank flush and confirm the tray is not overflowing | It continues after seating checks, or the machine leaks while off |
Drip tray water after steam can be normal
The Bambino Plus can purge water into the drip tray immediately after steam use. That purge helps bring the thermocoil back to the right temperature. The normal version is contained: water lands inside the tray, the tray is pushed firmly into place, and the tray is not overflowing.
Empty the tray when its indicator shows, push it fully back in, and run another steam cycle. If the only water is inside the tray right after steaming, keep using the machine.
Stop treating it as normal tray purge when water appears under the tray or body, steam splutters from the tray during brewing or cleaning, espresso output drops sharply, or all brew water goes to the tray. Owners with tray symptoms often lose time by treating every tray discharge as normal purge; the timing and output matter.
Portafilter rim leaks need seating and clearance checks
A leak around the portafilter edge during a shot usually deserves mechanical checks before more grind changes. The manual’s first checks are plain: insert the portafilter correctly, rotate it until resistance is felt, clean excess coffee from the filter-basket rim, and avoid overfilling the basket.
Look closely at where the liquid escapes. A rim leak comes from above the basket edge, around the sides, or down the handle. Clean the rim of the basket and the group seal area you can safely reach. Lock the handle from the INSERT position until it resists. If the basket is crowded, lower the dose and trim after tamping with the Razor tool so the puck clears the shower area.
Basket choice can matter because clearance changes. The manual lists 8–11 g for the 1 CUP basket and 16–19 g for the 2 CUP basket, and it treats the Razor tool as the dose-height control after tamping. If you use a puck screen, third-party basket, or bottomless portafilter, remove the accessory for one test shot. If the leak stops, the issue is likely seating or clearance, not the coffee alone.
Puck spray is different from a rim leak
Bottomless portafilters make puck problems visible. Multiple thin streams from the bottom of the basket or outlet area usually point to channeling: pressurized water finding weak spots in the puck. That calls for distribution, a straight tamp, and grind or dose adjustment.
The manual’s extraction cues help sort this out. A typical extraction starts after about 8–12 seconds and flows slowly like warm honey. Under-extraction starts sooner and runs fast; over-extraction starts later and may drip or not flow. Breville also gives a tamp range of 22–33 lb / 10–15 kg.
Use the portafilter-rim checks only when liquid escapes around the locked rim, top, sides, or handle. Owners with rim leaks often report that changing beans, grind, dose, and tamp did not solve the leak because the sealing surface was still dirty, overfilled, mis-seated, worn, or blocked by an accessory.
Little or no espresso with tray filling is a different warning
No-flow symptoms can look like leaks because water has to go somewhere. Before assuming a failed internal part, run the official user checks once: fill the tank, push the tank down completely to lock it, descale if indicated, use a slightly coarser grind, lower the dose, tamp within the recommended range, and clear blocked basket holes with the pin on the provided cleaning tool.
Then retest with a sensible dose and clean basket. The expected change is simple: water should return through the portafilter spouts or bottomless basket instead of barely dripping or disappearing into the tray.
Stop repeating cleaning cycles when most or all brew water still pours into the drip tray and little or nothing comes from the portafilter. Owner reports with this pattern commonly describe reset, cleaning, or repeated descaling as dead ends. At that point, contact Breville, the retailer, or a qualified repair shop rather than treating it as another dial-in problem.
Steam cleanup should come through the wand, not the group head
After frothing, wipe the wand and tip, then lower the wand so the machine can purge through it. The manual also warns that leaving the wand raised can trigger a lower-wand alert, shown by the MILK TEMP and MILK FOAM lights moving in a downward pattern.
For auto milk texturing, use the supplied stainless steel jug, rest it on the milk temperature sensor on the drip tray, and make sure the milk covers the steam-wand tip. Poor jug placement or a missed wand purge can create frothing trouble, but it does not make milk from the group head normal.
Water or steam from the group head — the shower area above the portafilter — while the steam wand is active is a different symptom. Repeated group-head discharge during frothing, especially milk later appearing from the group head, is a hygiene and repair concern. Stop running milk cycles and contact Breville or a repair service.
Bottom or tank-seat leaks need a tank check and service call
For water near the rear tank seat, underside vents, or the bottom of a new machine, first check the parts meant to be user-seated. The Bambino Plus tank sits at the back; fill it to the MAX marking, push it down completely, and confirm it sits flush against the back of the machine. The 1 CUP, 2 CUP, and STEAM buttons illuminate when the tank is correctly attached.
Also confirm the drip tray is not overfull or mis-seated. Those are the only quick user checks worth doing before you treat the water as a bottom or tank-seat leak.
A leak while the machine is off, a first-use underside leak after the tank is seated flush, water from underside vents, or visible internal leakage after the machine has been opened should not be chased with grind, tamp, or descaling advice. Stop using the machine if malfunction or damage is suspected, and contact Breville, the retailer, or a qualified repair service with the exact timing and first wet location.